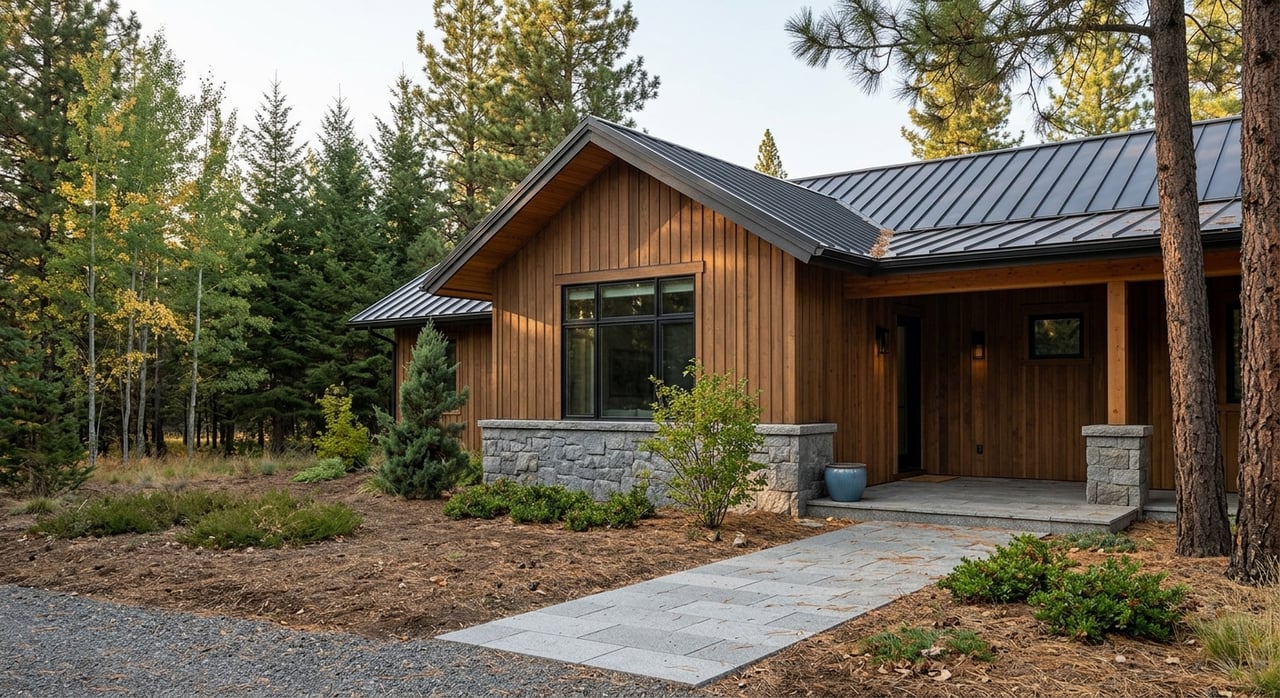
Your mountain view is your headline. If you are selling in Evergreen, buyers arrive hoping to feel that view the moment they step inside. You also need a plan for snow season, outdoor gear, and safe, inviting decks that show off the lifestyle. In this guide, you will get a clear, local staging strategy you can use room by room, plus timing, budget cues, and show-day checklists. Let’s dive in.
Why staging in Evergreen is unique
At roughly 7,000 to 7,200 feet in the Front Range foothills, Evergreen balances long winters with big-sky views and outdoor living. Snow can arrive early and linger into spring, which affects curb appeal, showing access, and photo timing. The season and light matter, as leaf-off and leaf-on views look different through your windows. Learn the rhythm of the market and climate, and time photos to the best light for your home’s setting, as noted in the local profile of Evergreen, Colorado.
Evergreen parcels sit within the wildland-urban interface. Jefferson County may require defensible-space permits in certain situations, and buyers often ask about mitigation and maintenance. Document any recent wildfire mitigation work and be ready to show it in your seller packet. You can review county defensible-space details on Jefferson County’s FAQ page.
Make views your headline
Windows are your primary asset. Arrange seating to face major windows and decks so the landscape becomes part of the room. Keep sightlines open by using low-profile sofas and removing tall plants or heavy drapery.
Clean windows inside and out and trim low branches where allowed. For deck photos, simplify railings and clear clutter so the eye goes straight to the horizon. Staging organizations and agents consistently emphasize that presentation and visuals matter in buyer decisions, as outlined by the National Association of Realtors’ staging guidance.
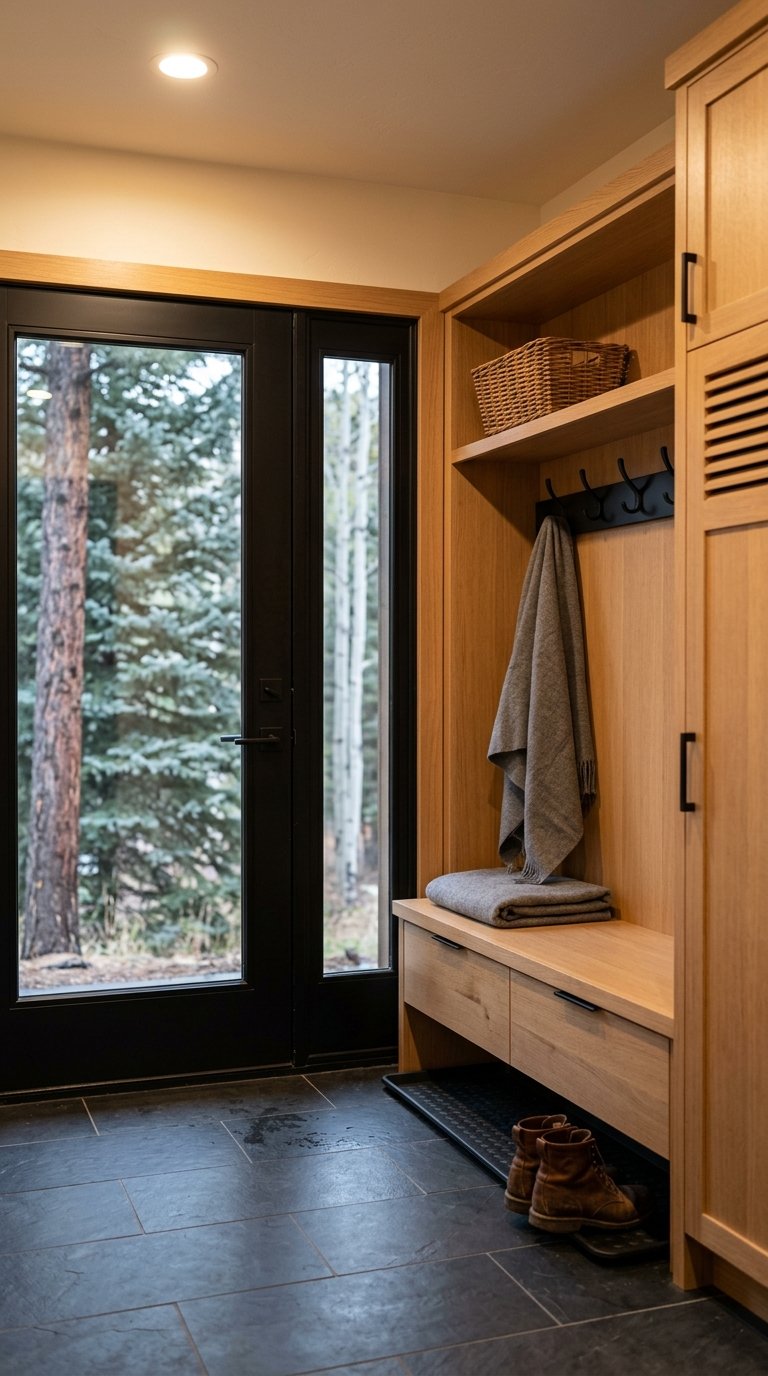
Streamline mudrooms and gear
Evergreen buyers expect a clean system for boots, skis, bikes, and jackets. Convert an entry or garage corner into a functional zone: a bench, sturdy hooks, and labeled cubbies. Durable flooring and absorbent mats send the message that the home handles snow days well.
If you need layout ideas, check simple, practical tips for winter-ready entries from Real Homes’ mudroom guide. To store skis and boards neatly and safely, vertical wall racks and smart mounts can help, as seen in this overview of ski storage ideas.
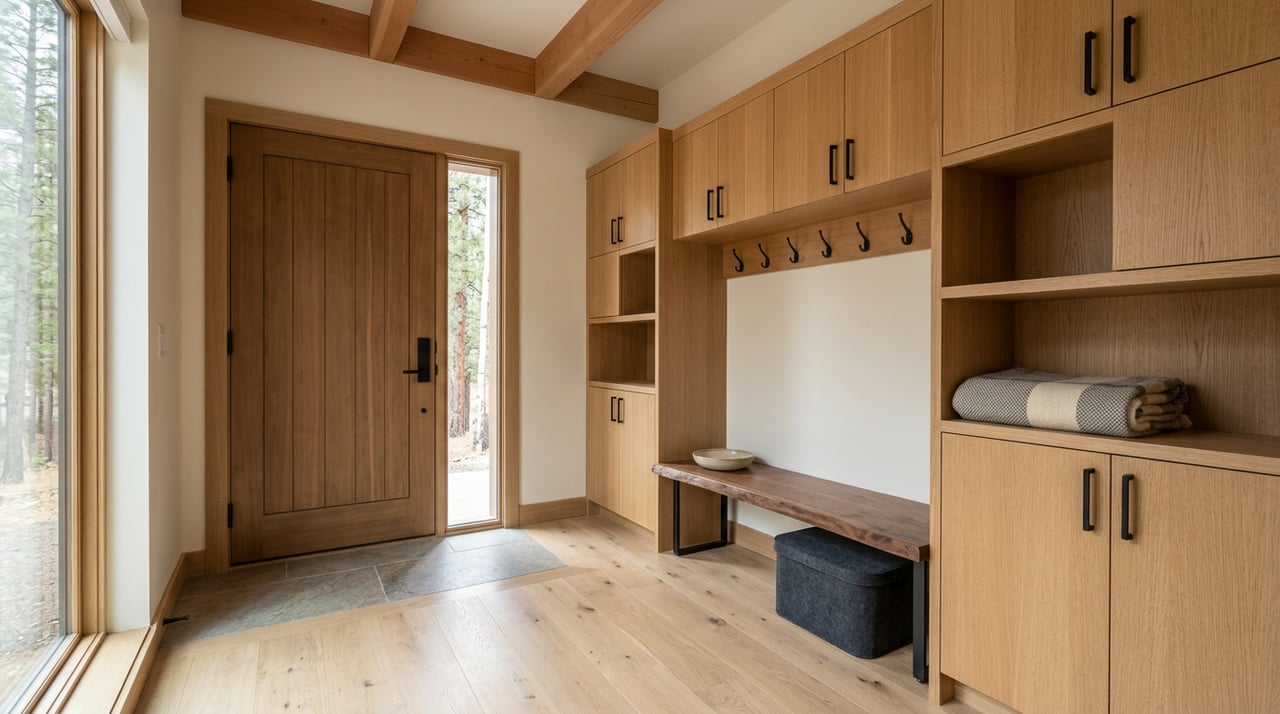
Hit the mountain-modern balance
Aim for a clean, bright base with warm neutral walls and layered texture. Keep your character pieces in leather, wool, wood, or stone, but reduce heavy log finishes or dark, dated stains. Edit busy decor so the architecture and light can shine.
Swift, high-impact updates often include new cabinet pulls, modern light fixtures, and refreshed textiles. These targeted swaps help homes feel current without losing mountain charm. Industry training resources note that such small updates can pay off visually and financially, as discussed by Home Staging Resource.
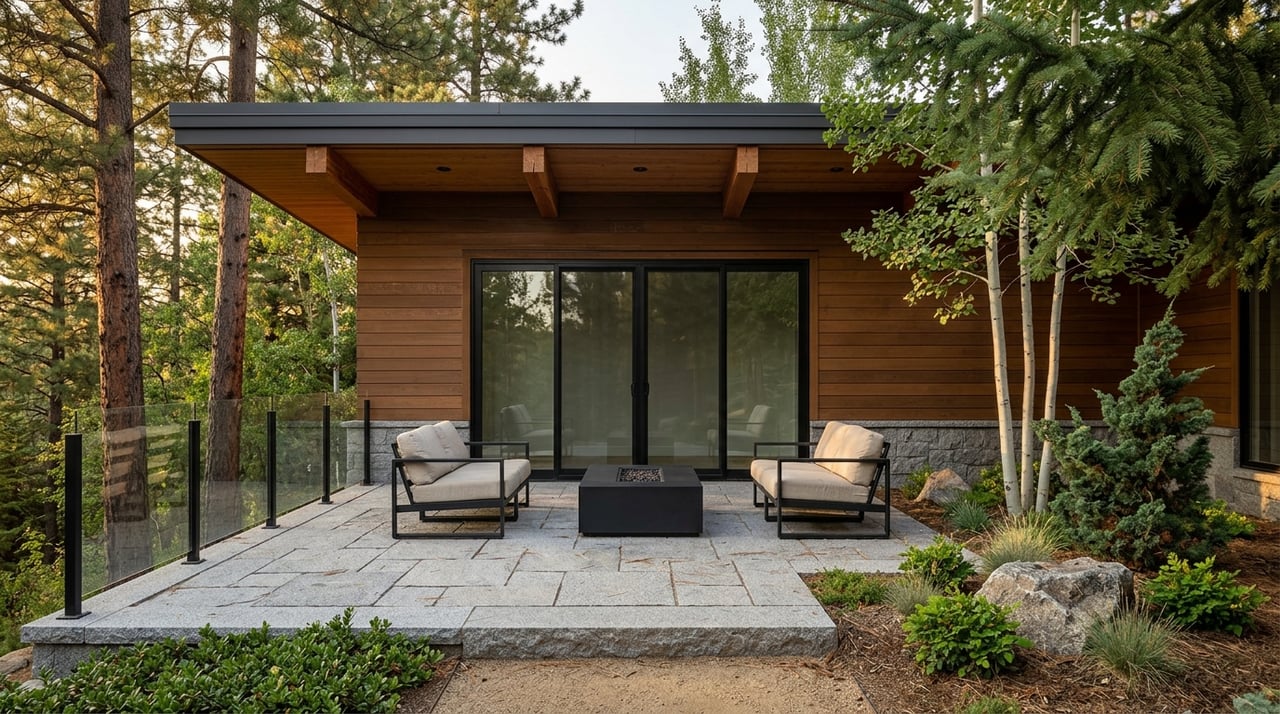
Elevate outdoor living safely
Decks, patios, and terraces should read as low-maintenance and ready to use. Keep one clear dining zone and one lounge area, tidy the grill, and add simple outdoor lighting for twilight photos. If you have a fire feature, avoid staging open flames during dry periods and keep maintenance documents on hand.
Buyers often find outdoor features highly appealing, and general maintenance tends to be a smart pre-list step. For context on which outdoor projects resonate with buyers, see the summary of NAR’s Remodeling Impact research from this report on outdoor features.
Light for warmth and clarity
Lighting changes how your home feels in person and in photos. Use warm white bulbs near 2700 to 3000K in living spaces to create a welcoming tone. Layer overheads, lamps, and accent lighting to remove dark corners.
High-CRI bulbs show true color on finishes and textiles, which helps photos look natural. For a quick refresher on choosing color temperature, review this guide from Westinghouse Lighting.
Room-by-room staging plan
Entry and mudroom
- Clear a direct path from the driveway and garage to the entry. Show a bench, one pair of boots per person, and labeled baskets for quick drop zones.
- Place a boot tray and a quick-dry mat. Add a neutral tray for keys and mail to keep surfaces clean.
Living room and great room
- Face seating toward the best view and the fireplace if you have one. Remove heavy patterns and excess small decor so the eye rests on the windows.
- Style a simple, cozy vignette near the fireplace with clean logs and two folded throws. Do not stage active fires in dry months.
- Turn on all lamps for showings and photos. Warm, layered light helps spaces feel larger and more inviting.
Kitchen
- Clear counters to essentials. A tidy coffee station and a single bowl of fruit are enough. Remove magnets and notes from the fridge.
- If dated, focus on deep cleaning, modern hardware, updated lighting, and neutral textiles. Save full remodels for when the numbers make sense.
Primary bedroom
- Make the bed with crisp, neutral layers. Remove most personal photos and accessories to create calm.
- Show tidy closets. Uniform hangers and clear shelves help buyers read storage at a glance.
Secondary and flex rooms
- Give each room a clear purpose: guest space, office, playroom, or gym.
- Right-size furniture so the room feels open and functional.
Bathrooms
- Refresh grout, use clean neutral towels, and keep counters bare.
- Add one small spa-style tray with soap and a plant for a touch of luxury.
Basement and bonus areas
- Create a defined use, like media, rec, or home gym.
- Add area rugs and task lighting to remove a cave-like feel and show egress and finishes clearly.
Garage and storage
- Clear space to show parking and easy flow.
- Store seasonal items in labeled bins on shelving systems, not scattered on the floor.
Outdoor areas
- Power-wash and sweep decks and railings. Stage one dining and one lounge area with weather-safe textiles.
- If a fire feature exists, keep it off during restrictions. Include recent service or installation paperwork in your seller packet.
Photography and visuals
- Book professional photos after staging. Capture daylight interiors, a twilight deck photo if you have outdoor lighting, and details like timber, stone, and the view.
- Buyers rely on strong visuals. NAR reports that staging can reduce time on market and influence offers, which makes professional images worth it. See the findings in this NAR newsroom report.
Timeline, budget, and pro help
Three-week quick start
- Week 1: Deep clean, declutter, knock out quick repairs, and schedule window cleaning and a deck sweep.
- Week 2: Set up the gear zone, swap basic hardware and lighting, refresh textiles, and tidy landscaping.
- Week 3: Install any rented or pro-staged pieces, complete photo prep, and shoot at the best time of day. Industry training sources estimate pro staging can range widely by scope, as noted by Home Staging Resource.
DIY vs pro staging
- Hire a pro if the home is vacant, high-end, or tricky to furnish. National data shows staging can shorten time on market and help offers, so weigh cost against likely impact. See the summary in NAR’s newsroom report.
Budget signals and ROI
- Even small, strategic updates can help your photos and in-person impression. Agents often report that staging boosts appeal and can lift offers in their markets. For outdoor projects, cost recovery varies, so present decks and features as maintained assets and lean on maintenance first, as summarized in this outdoor features report.
Show-day logistics for Evergreen
Winter readiness
- Shovel and treat walkways and the drive before every showing. Pre-heat the home for comfort and turn on lights to offset early sunsets.
- Twilight photos and evening showings can feel magical if access is safe and lighting is layered. For a winter-ready checklist, see this showing prep guide.
Wildfire season prep
- Do not stage open flames. Keep gutters clear, remove debris around structures, and showcase any defensible-space work with receipts and photos.
- Jefferson County may require defensible-space permits in certain WUI cases. Review permit details on Jefferson County’s FAQ page and include your mitigation summary in the seller packet.
Ready to list with confidence
When you stage for Evergreen’s seasons and lifestyle, you help buyers connect with your home faster and more fully. You also position your property clearly in a selective, view-driven market. If you want a local plan, pro photography, and tailored marketing for your Evergreen listing, reach out to Alicia Sexton. Let’s connect and start your staging plan.
FAQs
What makes staging different in Evergreen’s mountain market?
- Evergreen’s elevation, long snow season, and WUI setting shape how you present views, access, lighting, and outdoor spaces. Timing and documentation of mitigation matter.
How should I stage windows and views for buyers?
- Face seating toward major windows, remove visual blocks, clean glass inside and out, and keep deck styling simple so photos and showings spotlight the vista.
What is a simple mudroom setup that works for snow and gear?
- Use a bench, sturdy hooks, labeled cubbies, and a boot tray on durable flooring. Keep one pair of boots per person visible and store overflow neatly in bins.
Which updates deliver quick visual impact without a remodel?
- Swap dated hardware and light fixtures, edit decor, and refresh textiles in warm neutrals. These targeted changes modernize while preserving mountain character.
How should I stage decks and fire features during dry months?
- Define one dining zone and one lounge zone, keep surfaces clean, and avoid active flames. Show maintenance records and permit details in your seller packet.
What color temperature makes interiors feel welcoming in photos?
- Warm white bulbs around 2700 to 3000K with layered lighting create a cozy, clear look and reduce dark corners in living areas and lower levels.
When is professional staging worth it for an Evergreen home?
- Consider a pro if the home is vacant, high-end, or has an awkward layout. NAR reports that staging can shorten time on market and influence offer strength.
How do I prepare for winter showings so buyers feel comfortable?
- Clear and treat paths, pre-heat the home, and turn on all lights. Schedule twilight photos or showings only if access is safe and exterior lighting is set.